On Sunday I visited my mom. She went to see my grandma in South Carolina for Thanksgiving, so she brought me some old family photos from my grandmother and some farm fresh sweet potatoes from North Carolina. I didn't want them to sit in the pantry forever, so I decided to look through my new cookbooks I purchased at the newsroom book sale last week. A recipe for sweet potato biscuits caught my eye, so I decided to try it. Ya'll these are GOOD! They're from the Mary Mac's Tea Room cookbook. Here's the link to the cookbook on Amazon. It's got great southern recipes.

Here's the recipe:
3 cups all-purpose flour
2/3 cup sugar
2 tablespoons baking powder
1/4 teaspoon baking soda
1 1/2 teaspoons salt
8 tablespoons (1 stick) unsalted butter
2 cups mashed sweet potatoes, baked
2 tablespoons buttermilk
To bake the potatoes, rinse, then cover with foil while still damp. Bake for 45 min to 1 hour. The skin will fall right off.
Preheat the oven to 400 degrees. Grease the baking sheet and set aside. Sift together the flour, sugar, baking powder, baking soda and salt. (I don't have a sifter, so I just stirred them together.) Cut in the butter with your fingers or two forks until the mixture resembles coarse cornmeal. Add the sweet potatoes, stirring well to combine. Gradually add the buttermilk to form a soft dough. (I didn't have buttermilk, so I made my own by mixing 1 tablespoon of vinegar with 1 cup of milk and letting it sit 5 minutes.) Turn out onto a lightly floured board. (I had to use a bit more flour to keep it from being sticky.) Pat the dough into a 1/2-inch-thick circle and cut our the dough with a 3-inch biscuit cutter. Place on the baking sheet. Bake for 18-20 minutes, until the bottoms are lightly browned.
Now here's the photos. Food-blog style....
 |
| mash the sweet potatoes |
 |
| mix dry ingredients then cut in the butter |
 |
| mix in the sweet potatoes. use the rest for dinner. |
 |
| gradually add buttermilk |
 |
| roll out the dough |
 |
| cut the biscuits. i used the heart pancake mold i have. or use the top of a wine glass. |
 |
| bake for 18-20 minutes |
 |
| you'll be left with a messy kitchen, but it's worth it. |
 |
| served with a mesclun greens salad from the garden! |
Now for the chairs. You probably know I found some sweet chairs for $10 each at a yard sale last Friday. One was quite rickety, so we decided to fix it with a little wood glue. Couldn't take long, right?
Well we googled "chair repair" or something similar and realized we'd be taking the entire chair apart, sanding it and gluing it back together with the help of a clamp. So I set out for the JoAnns and Home Depot to get the glue, fabric and foam for the cushions, and a clamp and bungee cords. I'm too cheap to buy multiple clamps, so I figured the bungee cords would help hold it together. We took the chair apart carefully using a mallet. While I was gone shopping, Scott sanded the old glue at all the joints. We had to replace some of the wooden dowels that broke while taking it apart. I suspect they were broken already. Then we put it back together again one side at a time, gluing and clamping.
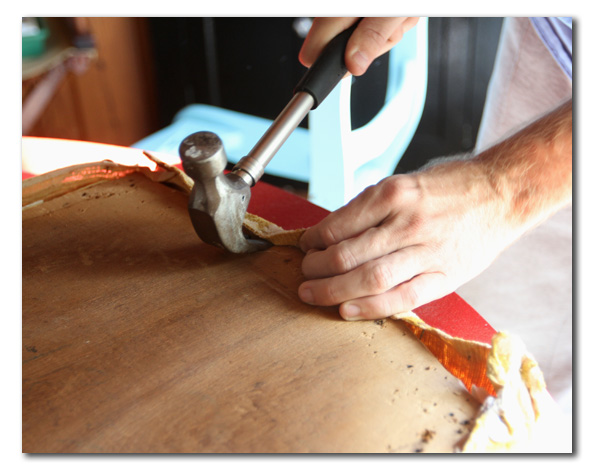
I forgot to take a photo of the after of this chair. And I forgot to photograph the process of recovering the cushions. Here's Scott taking the cover off one of the cushions. The previous owner used old fabric scraps for the padding -- not very comfortable. I bought some new 2-inch foam and they're super comfy now.
Here's the other chair. We only had to glue one joint, so we didn't take it apart, just glued and clamped. The rickety chair was a full-day project, but it's as good as new now.
Before:


no new paint? looks like a lot work went into that one chair. ugh! ANd now I'm craving sweet potatoes!
ReplyDeleteOf course no new paint. Why mess with perfection. Carolina Blue!!!!!
ReplyDeleteWe're saving the repainting for later. I had to get them stable so dad and judy could sit in them without falling.
ReplyDelete